
Progress That Can Be Seen
I was minding my own business at Home Depot a few days ago when I noticed that flooring was 50% off. So I made up my mind quickly and snagged a few boxes. As it turned out, to add the flooring to the front 2/3’s of the van only required 2 cases (with a single leftover panel). And it only took about 3 hours to install. The tricky bits were the first board, which needs to be square and the last board, which needed to be ripped length-wise. I also needed to locate the 4 attachment points fairly precisely, so the L-track could be reinstalled.
Just like in a house, the flooring has space (1/4”) on the perimeter to float/expand/contract if needed. It also means that at some point in the future, changing the flooring wouldn’t be impossible. On the sliding door side, I added some aluminum trim to hide the floor edges.
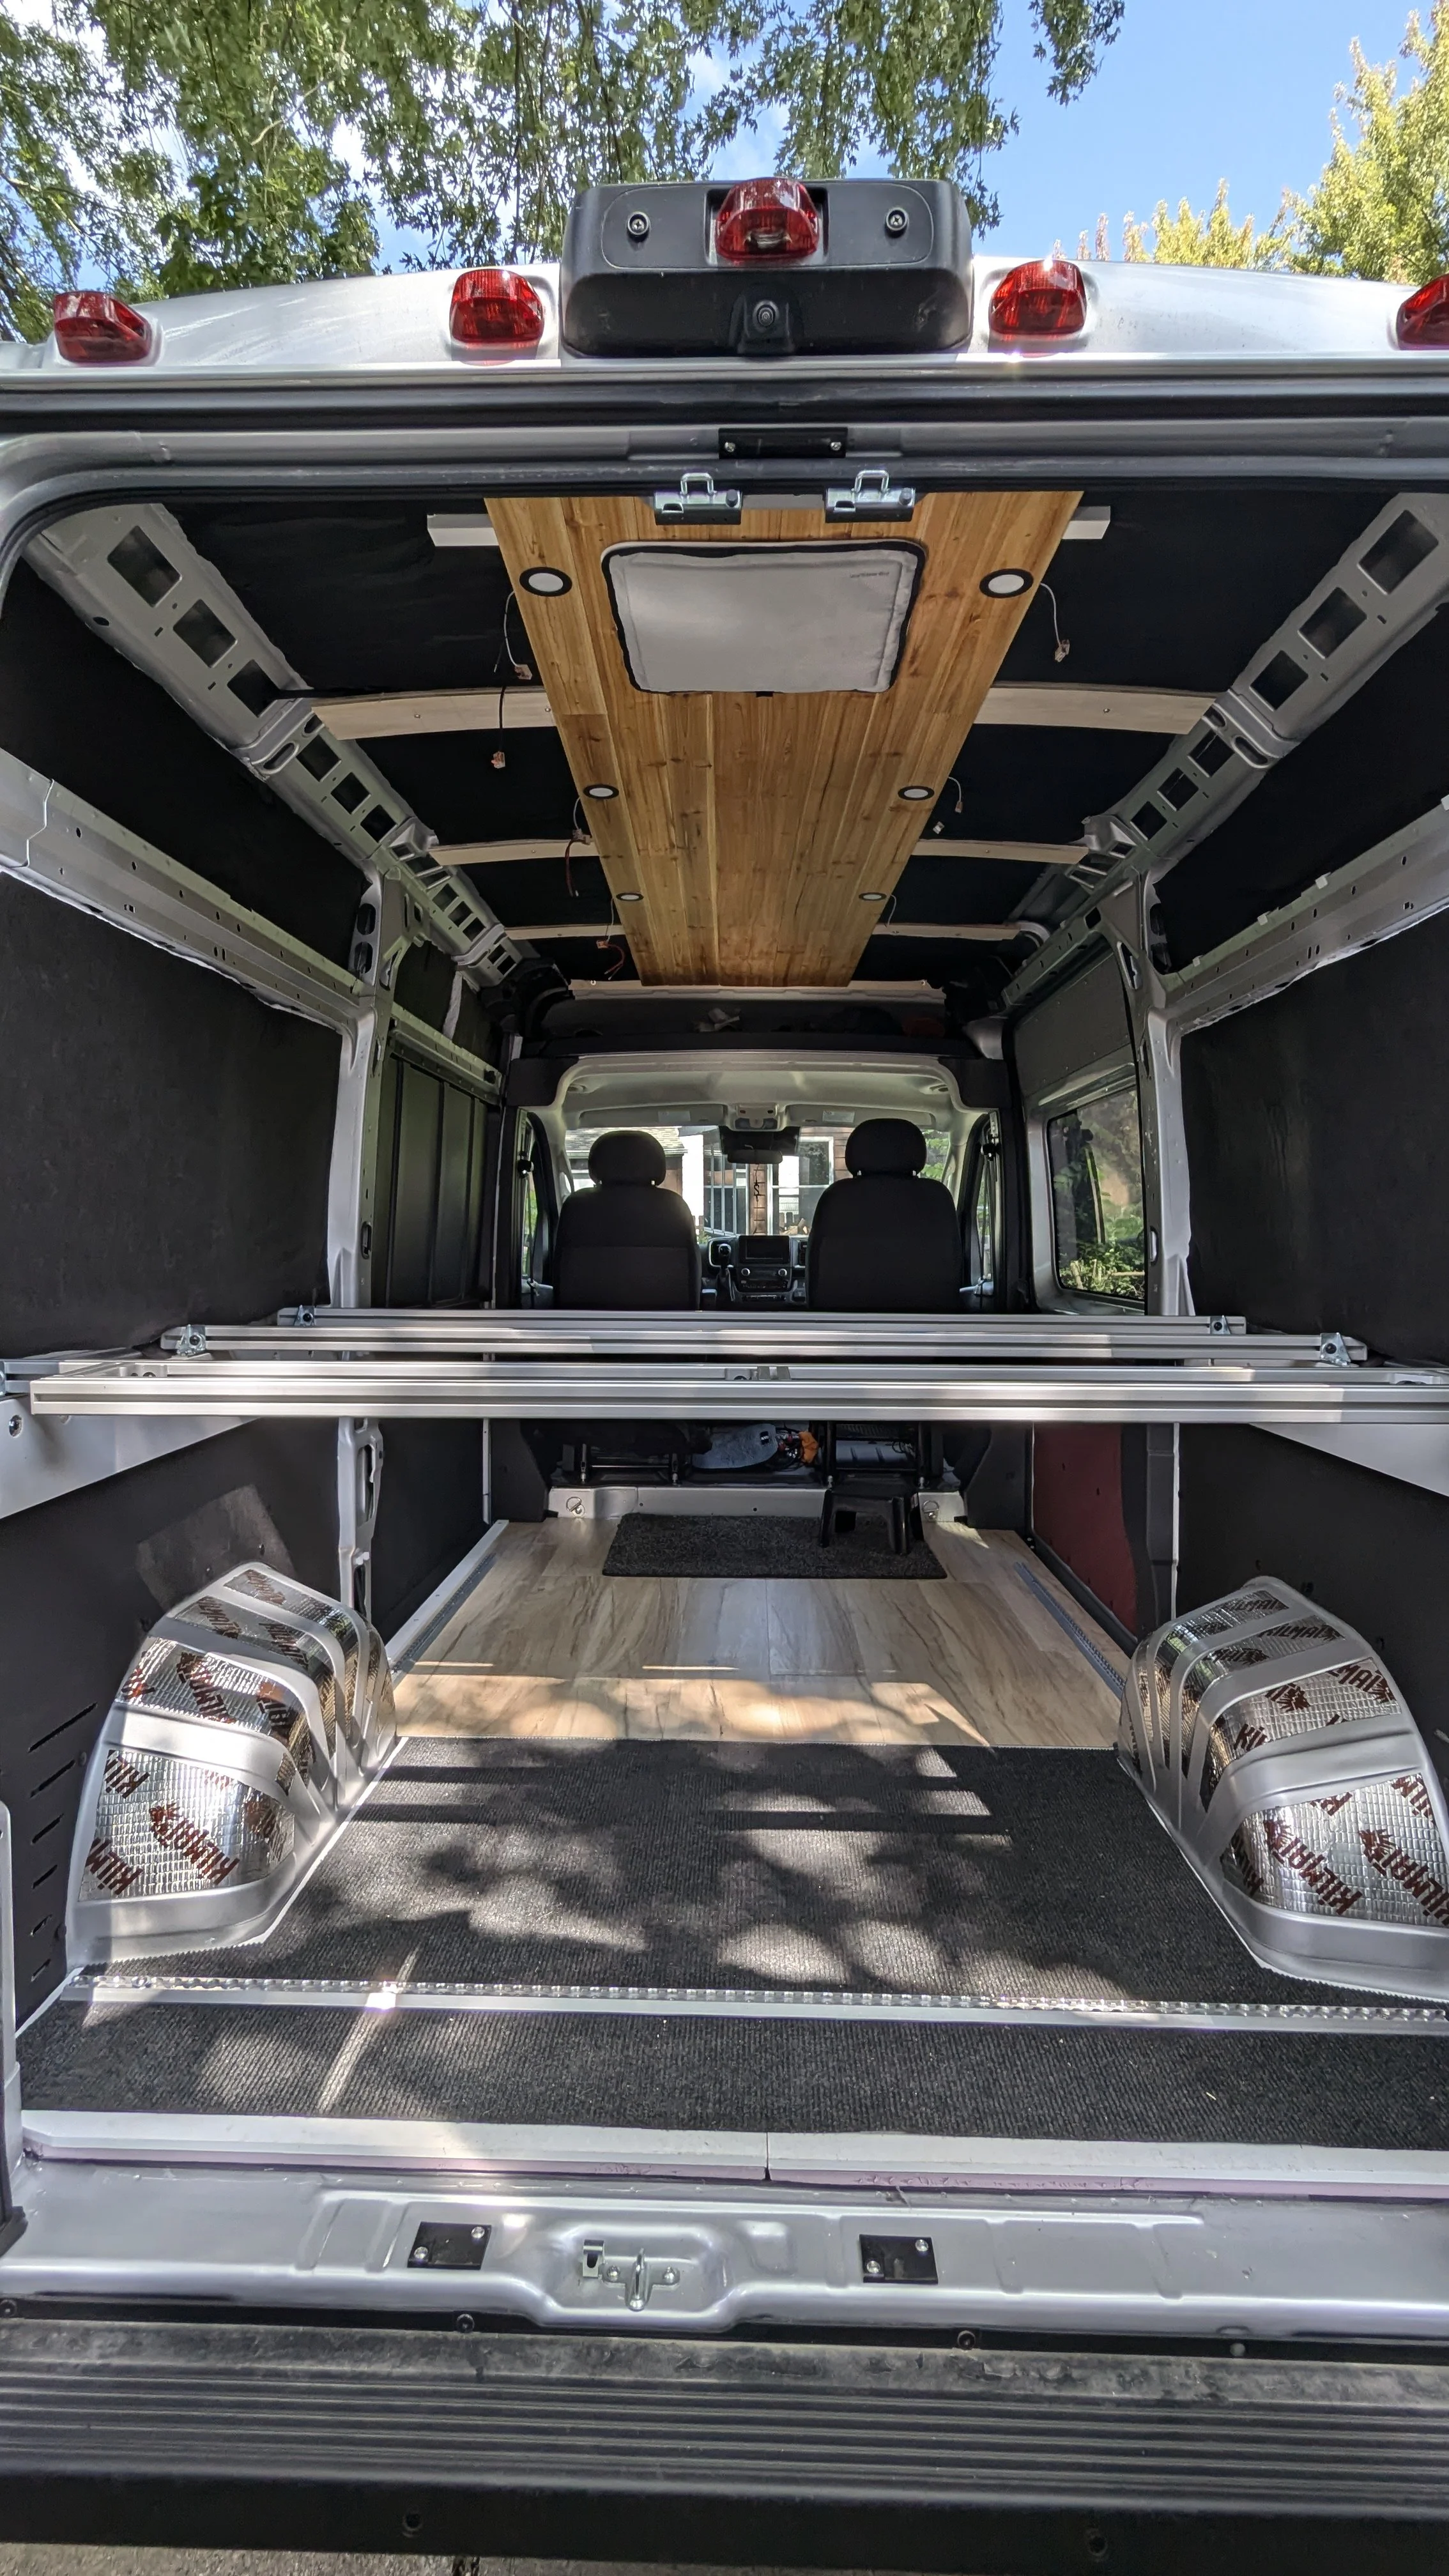
You can see that in the back of the under the bed frame, there will be a different type of floor. I will probably use something similar to the durable material that is used in home gyms. This area is essentially the truck or garage space, so a material that is waterproof and easy to clean and not too expensive is what I’ll look for.
You can also see what comes next, as I have the middle portion of the cedar ceiling complete, including the part that holds the puck lights. The next step is to hanging all of the wiring circuits that need to go from the driver side power source to the passenger side wall. Then I can continue installing the rest of the ceiling boards. I am trying to be methodical with this electrical step, think of all the places I’d ever want power and get the wires in the walls now. There will be no regret phase (I hope).